Dolomites Itinerary Overview
The Dolomites are one of the most scenic regions in Italy, known for dramatic mountain peaks, alpine meadows, and iconic viewpoints that feel almost unreal. This itinerary focuses on the most photogenic and well-known spots in the Dolomites, making it ideal for first-time visitors who want to experience the highlights without rushing.
Designed as a road trip, this route balances short hikes, scenic drives, and sunrise and sunset photo locations — while still leaving some flexibility for weather changes, which are common in the mountains.
How Many Days Do You Need in the Dolomites?
How many days you need in the Dolomites really depends on what you want to do. For a first visit that focuses on the most iconic locations, 6 days is a great amount of time for a road trip. It allows you to see the highlights without feeling constantly rushed.
If you’re short on time, it’s possible to squeeze most major spots into 5 days, especially if you skip one or two hikes. That said, if photography is a priority, having an extra buffer is incredibly helpful. Weather in the Dolomites can change quickly, and flexibility often makes the difference between average conditions and unforgettable light.
What makes the Dolomites truly special is their variety — you could return many times and still have completely different experiences. From skiing in winter, to hut-to-hut hikes, to exploring the surrounding wine regions, this is a destination that never gets repetitive.
Is This Dolomites Itinerary Best Done by Car?
While there is some public transportation available in the Dolomites, this itinerary is best done by car, especially if you enjoy photography. Early mornings and late evenings are often the best times for light, and having your own car gives you the flexibility to move freely without relying on bus or cable car schedules.
I highly recommend renting a car. Although some roads are winding, driving was never challenging or stressful, and nothing felt particularly narrow. In fact, we encountered plenty of sports cars along the way — a good sign that the roads are well maintained and enjoyable to drive.
One important thing to keep in mind is that distances can be deceptive. Locations may look close on a map, but large mountain ranges often require long detours around valleys, making driving times longer than expected. A car makes these transitions much more manageable.
Best Time to Visit the Dolomites
Unless you’re visiting specifically for skiing, summer is the best time to follow this Dolomites itinerary, typically from June to September. July and August are peak season, with the best weather but also the largest crowds.
We visited in early June to avoid the crowds, and it definitely paid off. Having popular spots almost to ourselves in the early mornings made a huge difference, especially for photography. The trade-off was less stable weather, some lingering snow at higher altitudes, and a few cable cars and mountain huts still being closed.
Despite those downsides, the lack of crowds and the ability to take photos without people in the frame made it worth it for us. If I were to do the same route again, I’d likely go mid to late June, when most huts and gondolas are open, but before peak summer tourism really kicks in.
6-Day Dolomites Road Trip Itinerary
Day 1 – Merano, Great Dolomite Road & Lago di Carezza
We started our Dolomites road trip in Merano, a charming place with a beautiful old town that’s perfect for a relaxed stroll. If you need last-minute hiking gear or souvenirs, this is a great place to stock up. Parking is easy, even close to the center — we used Karl-Wolf-Parkplatz, just a two-minute walk from the old town.
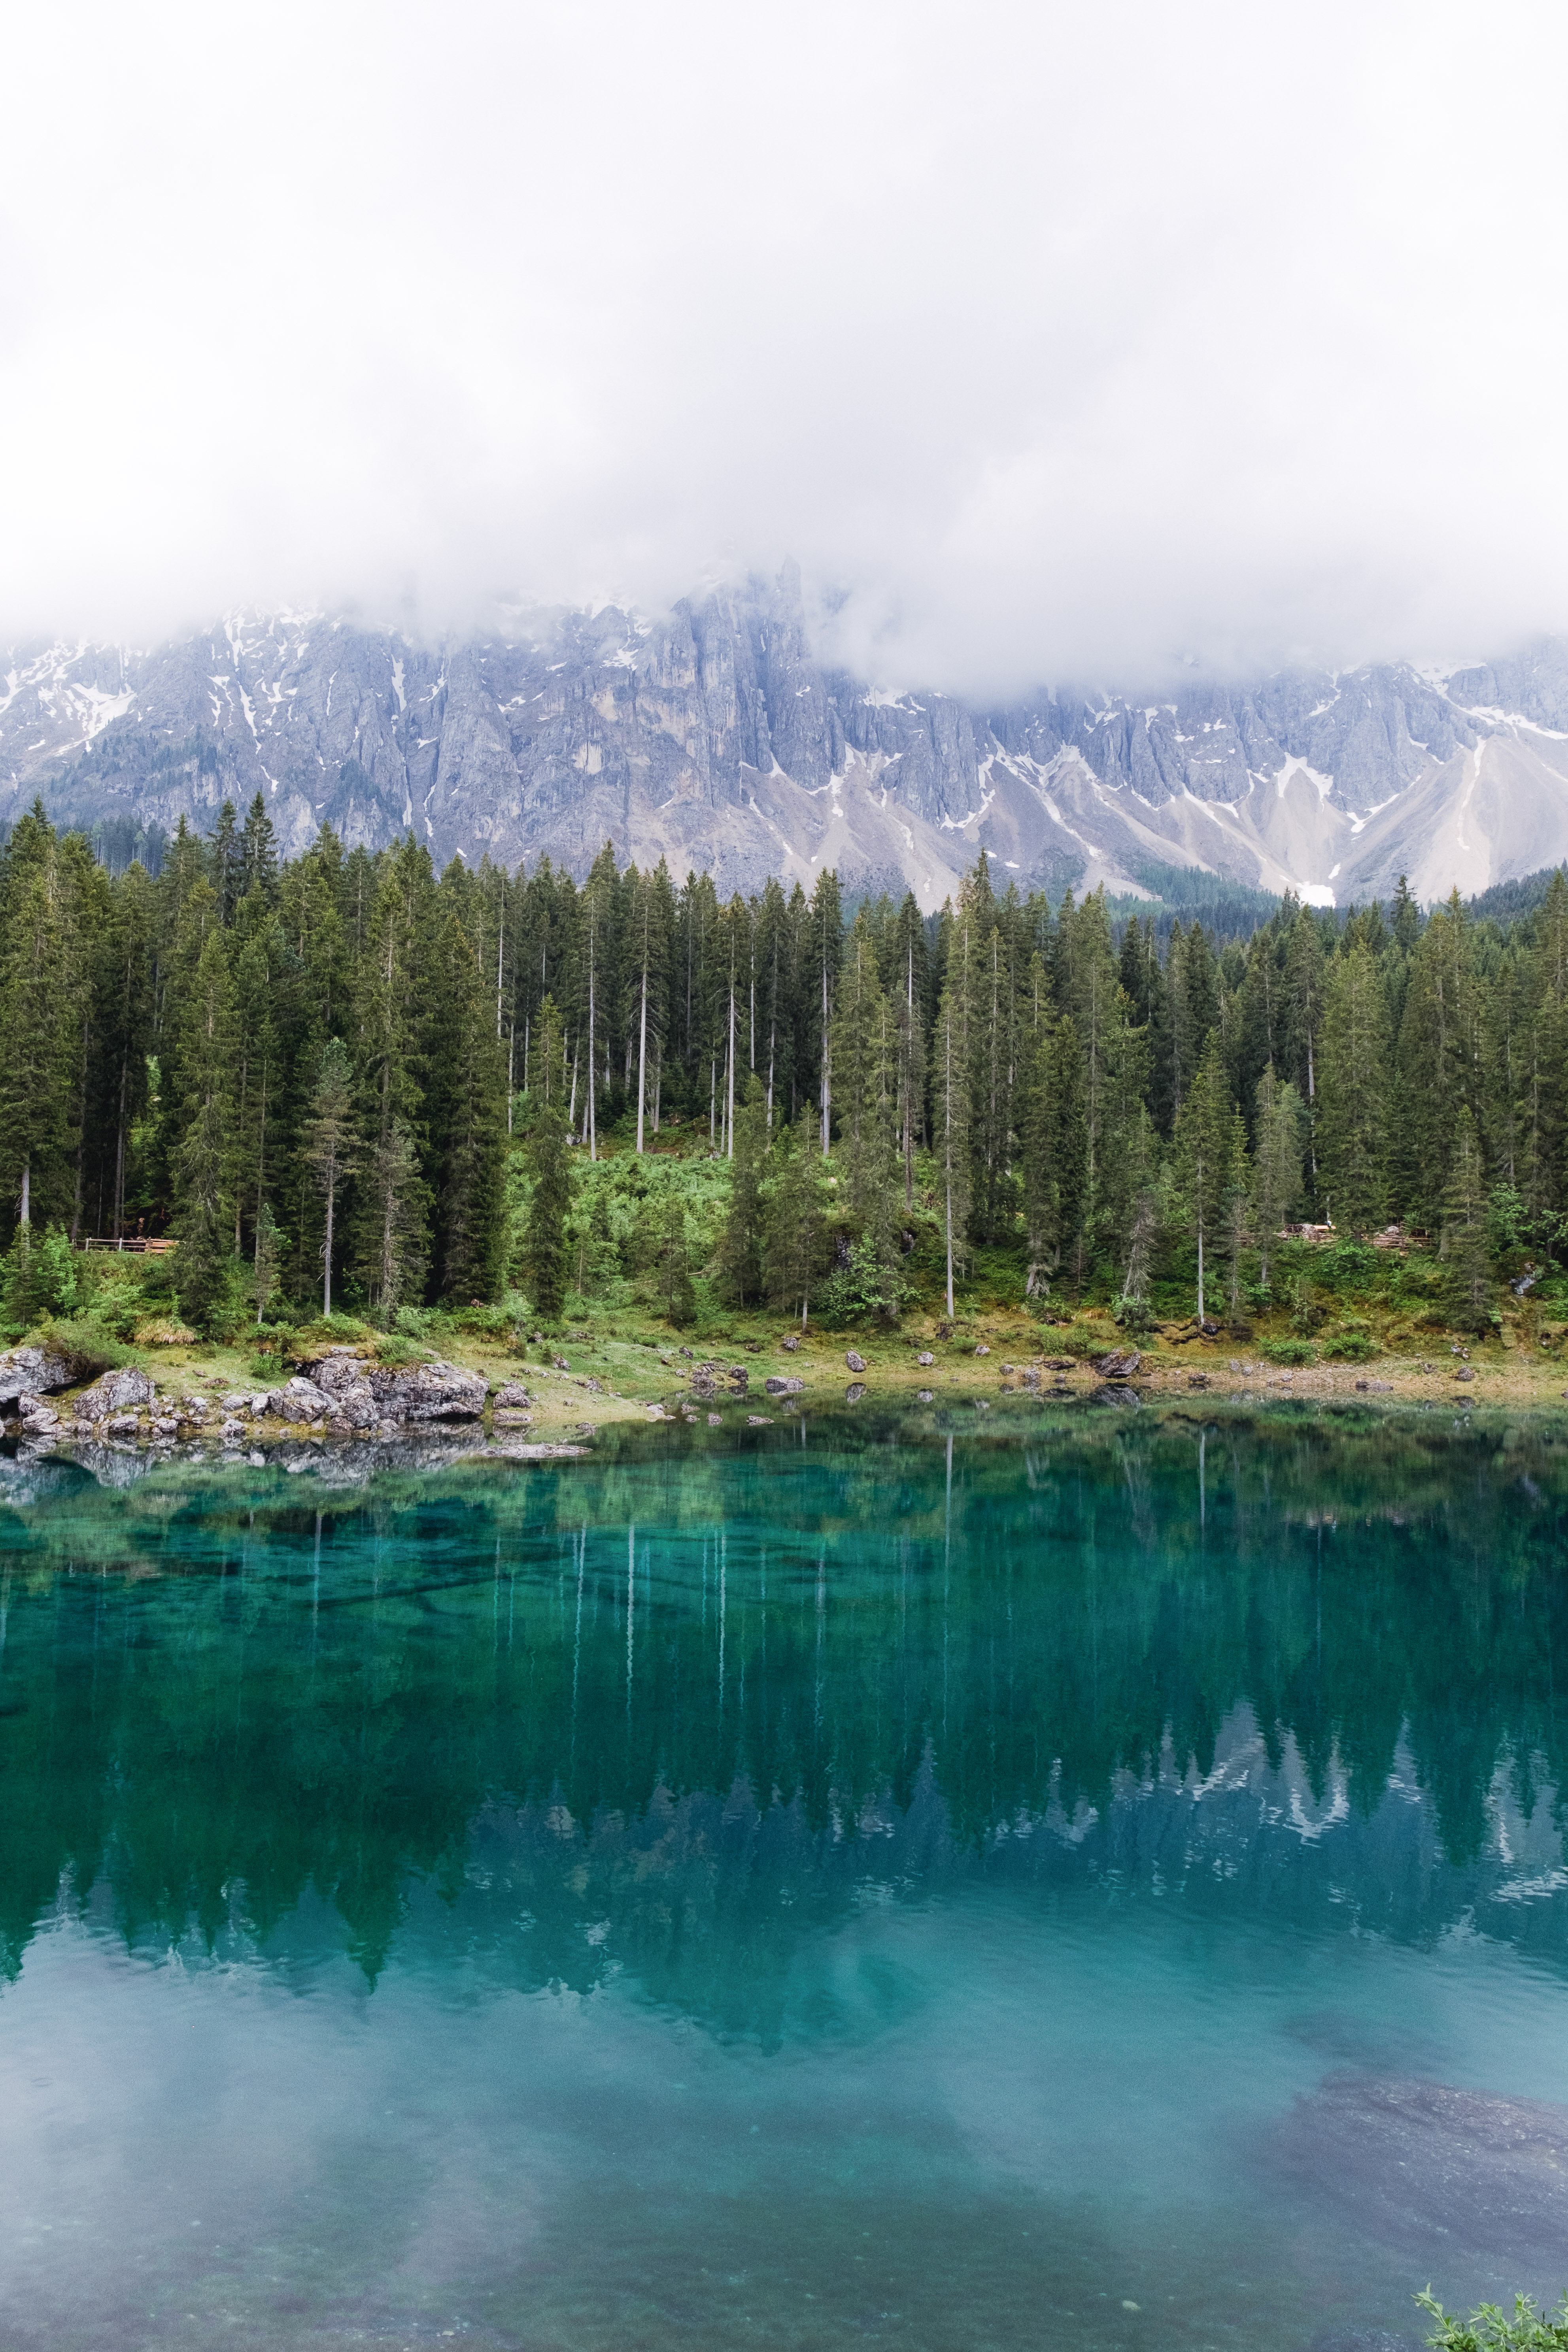
From there, we headed toward Bolzano, where the famous Great Dolomite Road begins. This scenic route runs all the way to Cortina d’Ampezzo and makes for an ideal introduction to the Dolomites. About halfway along the route lies Lago di Carezza, our main stop for the day.
We arrived at Lago di Carezza in the late afternoon, after most tour buses had already left — highly recommended. There’s a parking lot right next to the lake with basic facilities, but spaces are limited, so aim for either early morning or late afternoon. We opted for a relaxed 30-minute walk around the lake, which offers plenty of viewpoints and reflections.
Where to stay
Spend the night in Nova Levante, just a five-minute drive from Lago di Carezza. Staying nearby gives you flexibility to react to weather changes and quickly return for sunrise or sunset photos. Keep in mind that Nova Levante is a small village, so if you plan to eat out, it’s best to book dinner in advance.
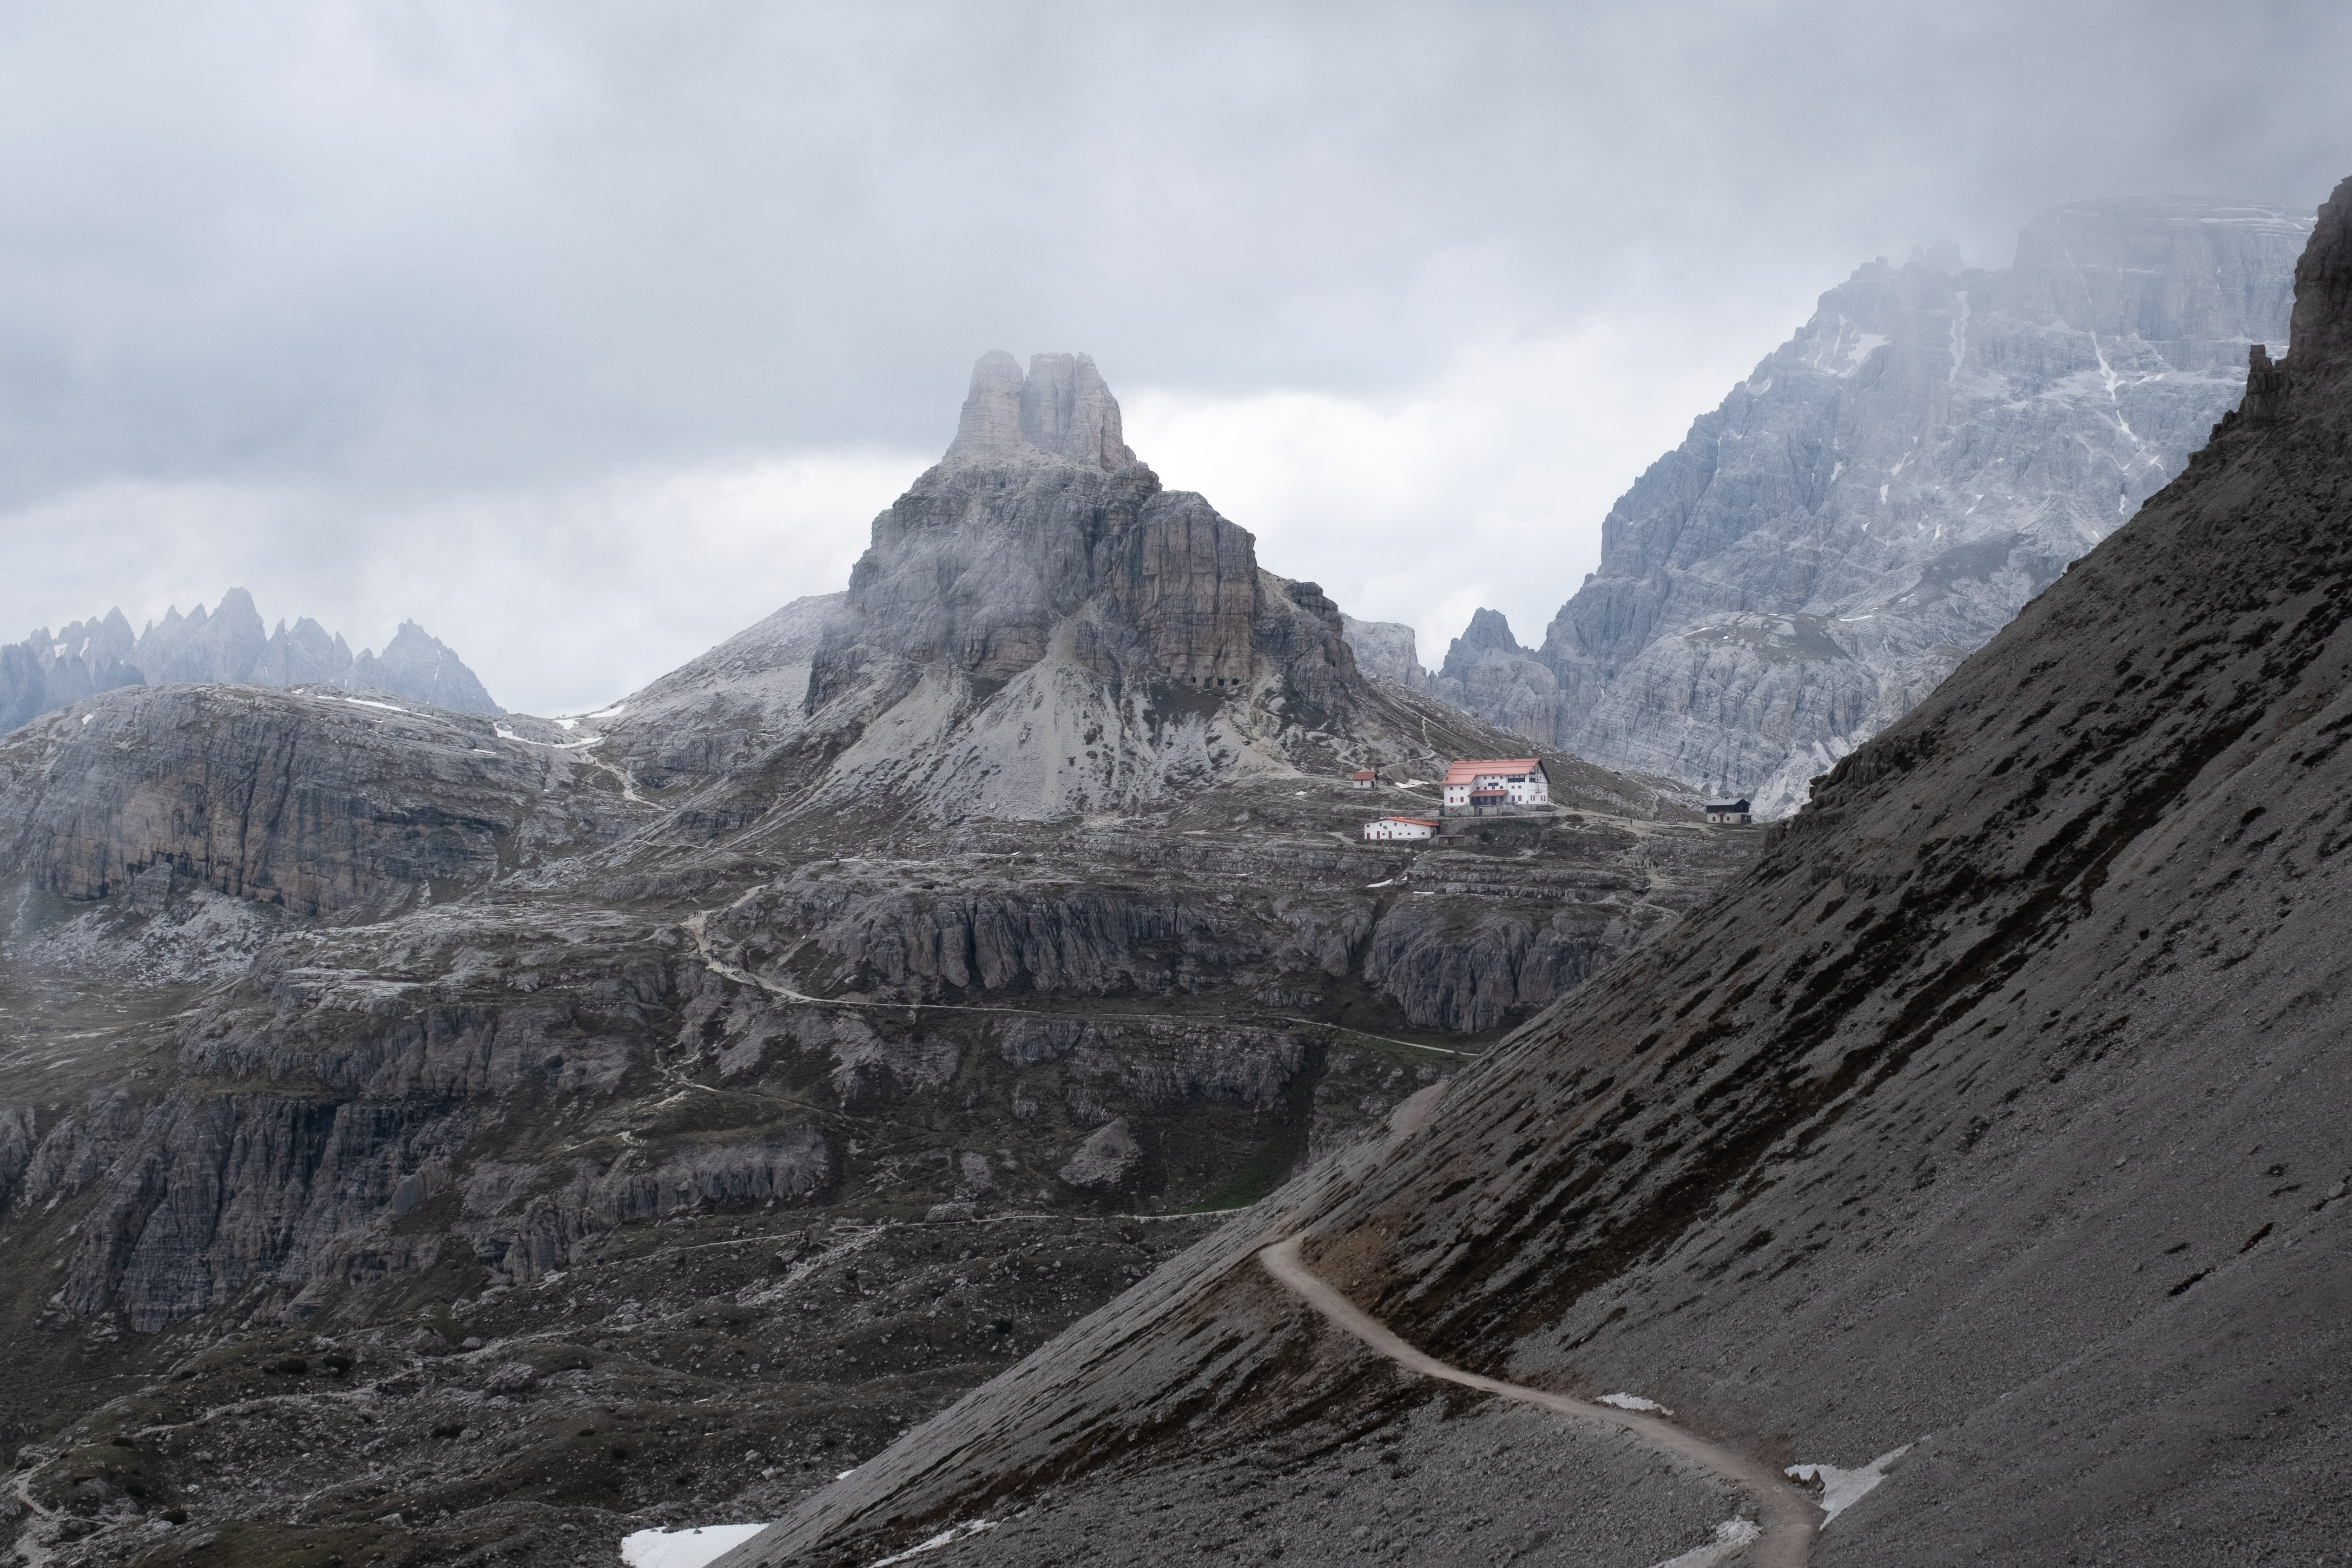
Day 2 – Passo Giau & Cadini di Misurina (Tre Cime Area)
In my opinion, Passo Giau is one of the most scenic mountain roads in the Dolomites. The road is winding, and you’ll want to keep your eyes on the asphalt to avoid car sickness, but the panoramic views at the top are absolutely worth it. Even in early June, when many restaurants were still closed, Berghotel Passo Giau was open and offered lunch with an incredible view over the surrounding valleys.
How to Get to Tre Cime di Lavaredo
Cadini di Misurina lies right next to Tre Cime di Lavaredo, and both are accessed via the same road. Since summer 2025, you can freely drive up to this parking area (near Misurina), but access beyond that point requires a special pass. A checkpoint shortly after controls entry.
To reach Tre Cime, you have three options:
- By car with an access pass
Passes must be booked well in advance and sell out quickly (checkout this page here). One pass is valid for up to 12 hours and requires you to select an entry time. In June 2025, a 12-hour pass cost €40, including parking at the top. You’ll need a license plate to book, but this can be changed later if you’re renting a car. - By hiking
Park in Misurina or at the lower parking lot and hike up. This is a good option if you want a more physical approach but requires extra time and energy. - By bus
Park in Misurina or at the lower parking lot and take the bus to the top.
We chose the car access pass to maintain full flexibility and avoid carrying all our camera gear uphill before starting the actual hike.
Cadini di Misurina is especially beautiful during golden hour. The hike takes about 30 minutes each way on mostly flat terrain. The viewpoint itself is exposed, with steep drops on all sides, and can get crowded — but the scenery is absolutely worth it.
Where to stay
We were a bit early in the season, but ideally, we would have loved to stay at Rifugio Auronzo. Staying here allows for stargazing at night and sunrise photography in the morning. Booking opens in December for the following season and fills up quickly.
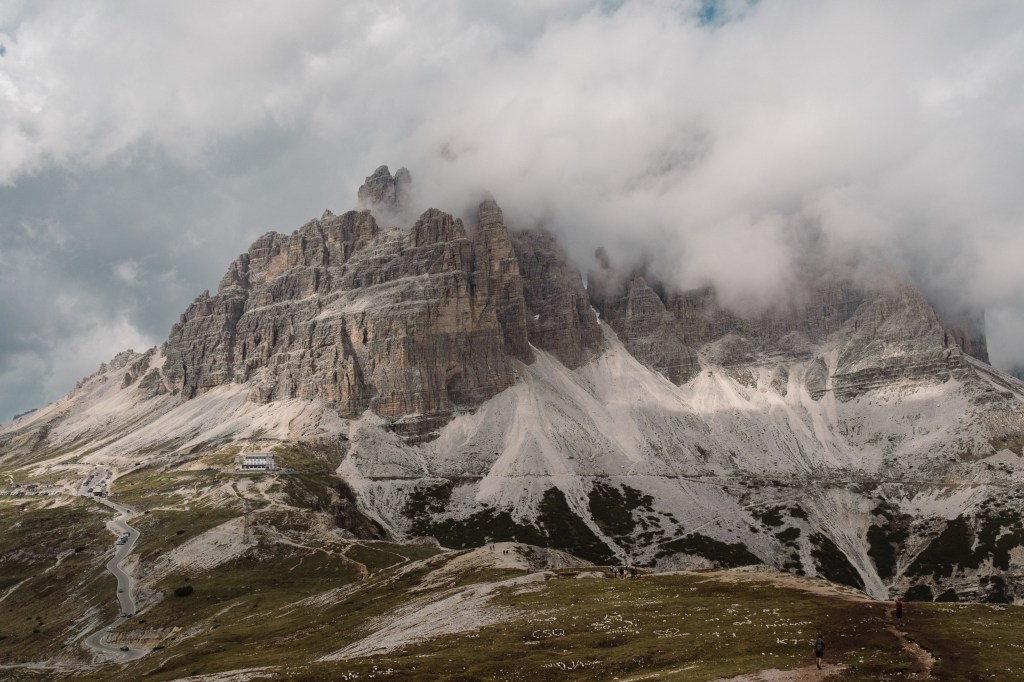
Day 3 – Tre Cime Circular Hike
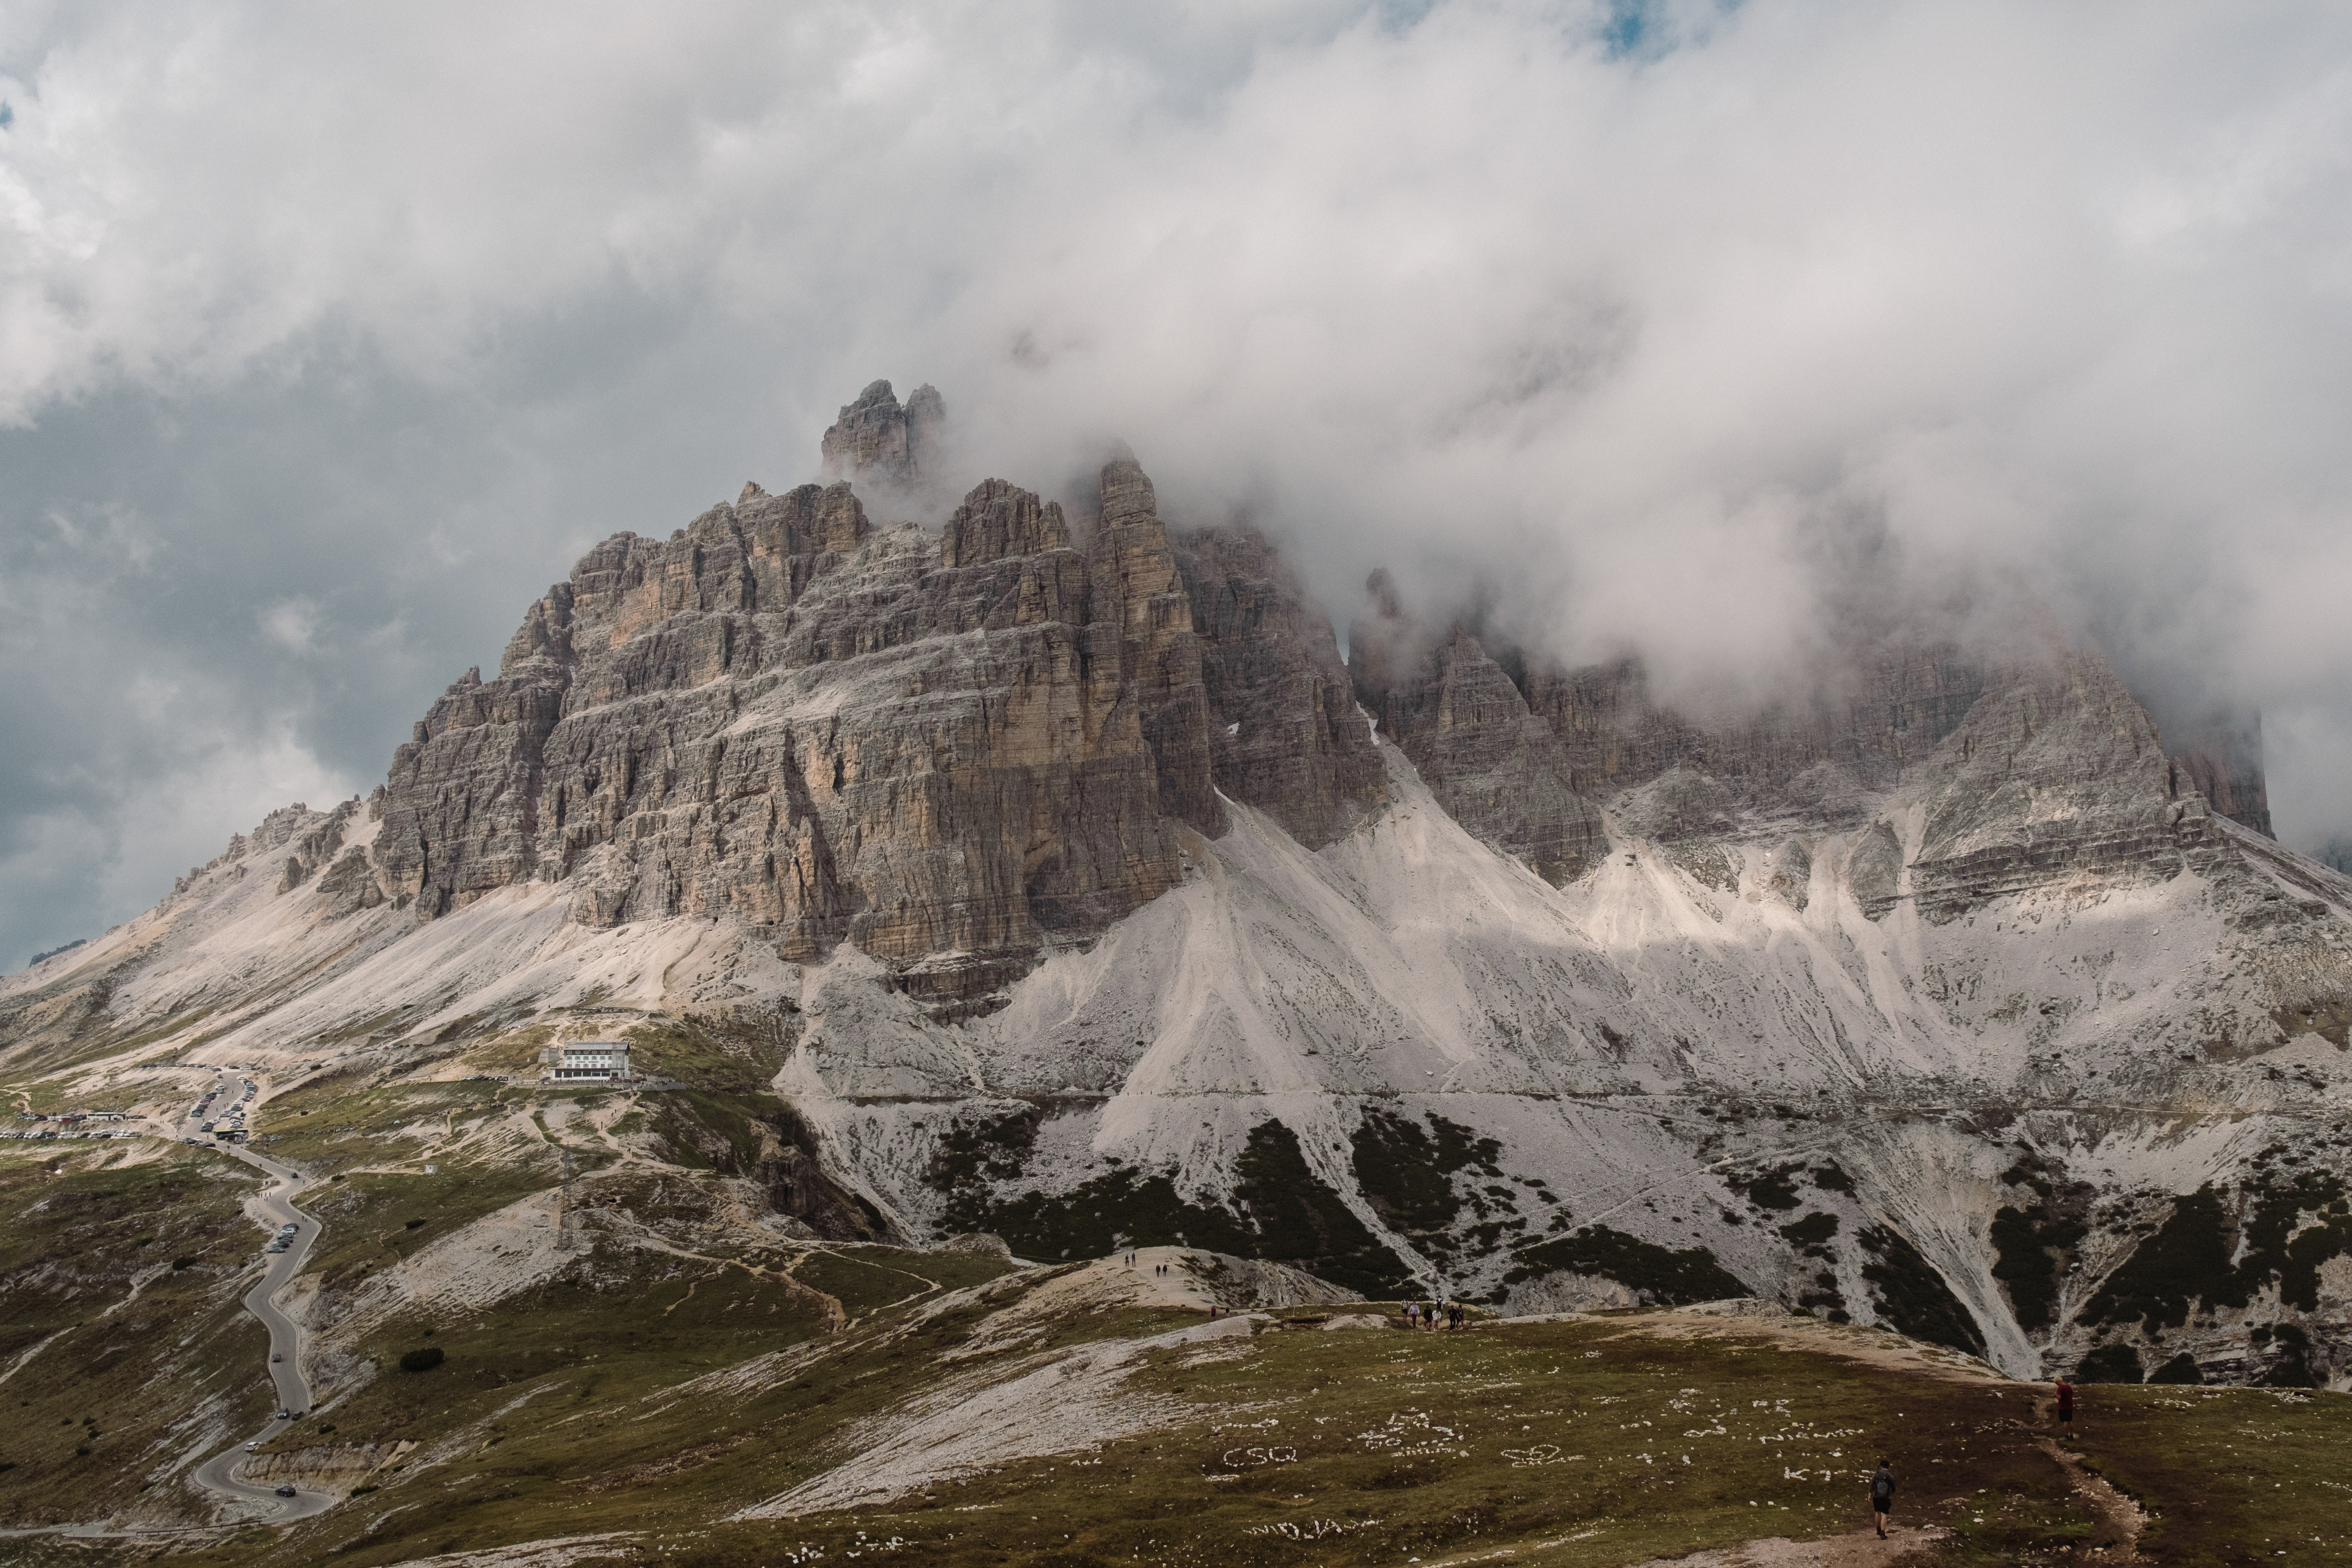
The classic Tre Cime hike starts and ends at Rifugio Auronzo and loops around the iconic peaks. It’s a relatively easy hike with several mountain huts along the way, making it accessible even for less experienced hikers.
Popular photo spots include:
- Forcella Lavaredo (often referred to as the “chocolate side” of Tre Cime)
- The cave viewpoints above Drei Zinnen Hütte
This is one of the busiest areas in the Dolomites, and you’re rarely alone, but the scenery easily makes up for it. Even though the hike is manageable, it’s still alpine terrain — always check the weather forecast in advance and be prepared for sudden changes.
Day 4 – Lago di Braies & Seceda
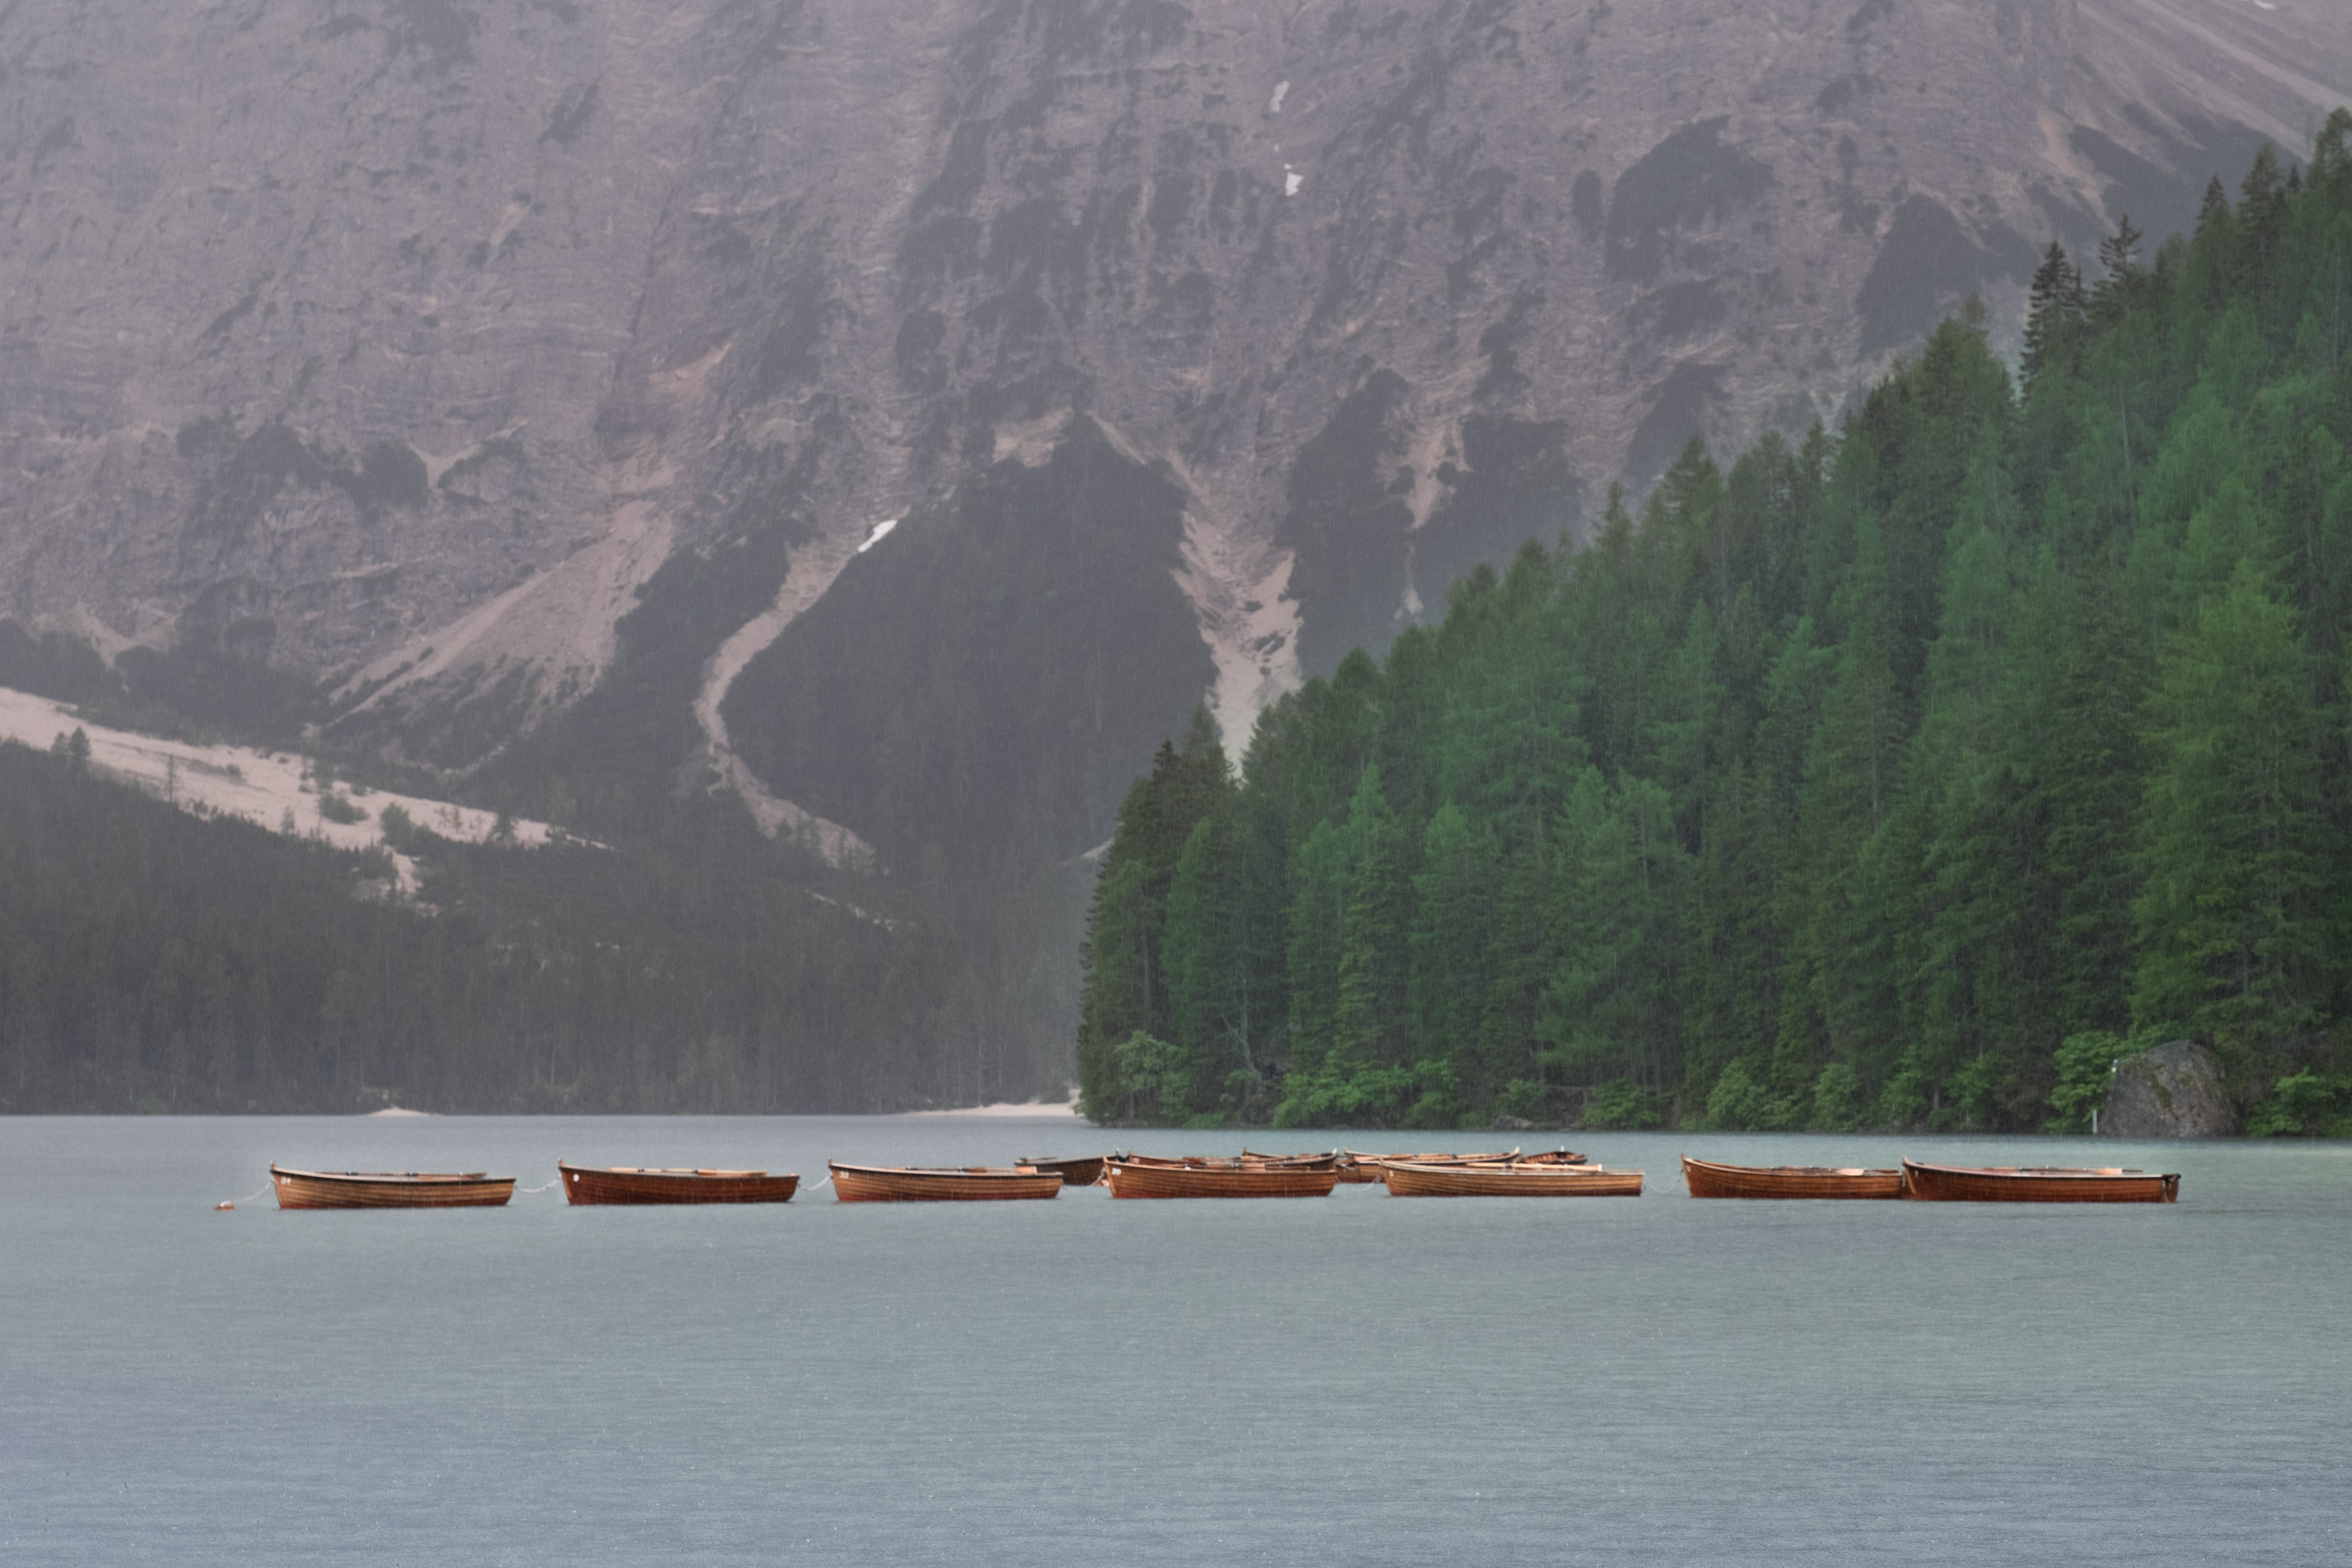
Lago di Braies is one of the most popular and easily accessible spots in the Dolomites. Multiple parking areas line the road leading up to the lake, including parking right next to the hotel. Prices vary slightly depending on location and season.
The lake itself is free to visit, and a mostly flat, family-friendly trail circles the entire shoreline. If photography is your priority, arriving early in the morning is key to avoiding crowds both on the path and around the boathouse.
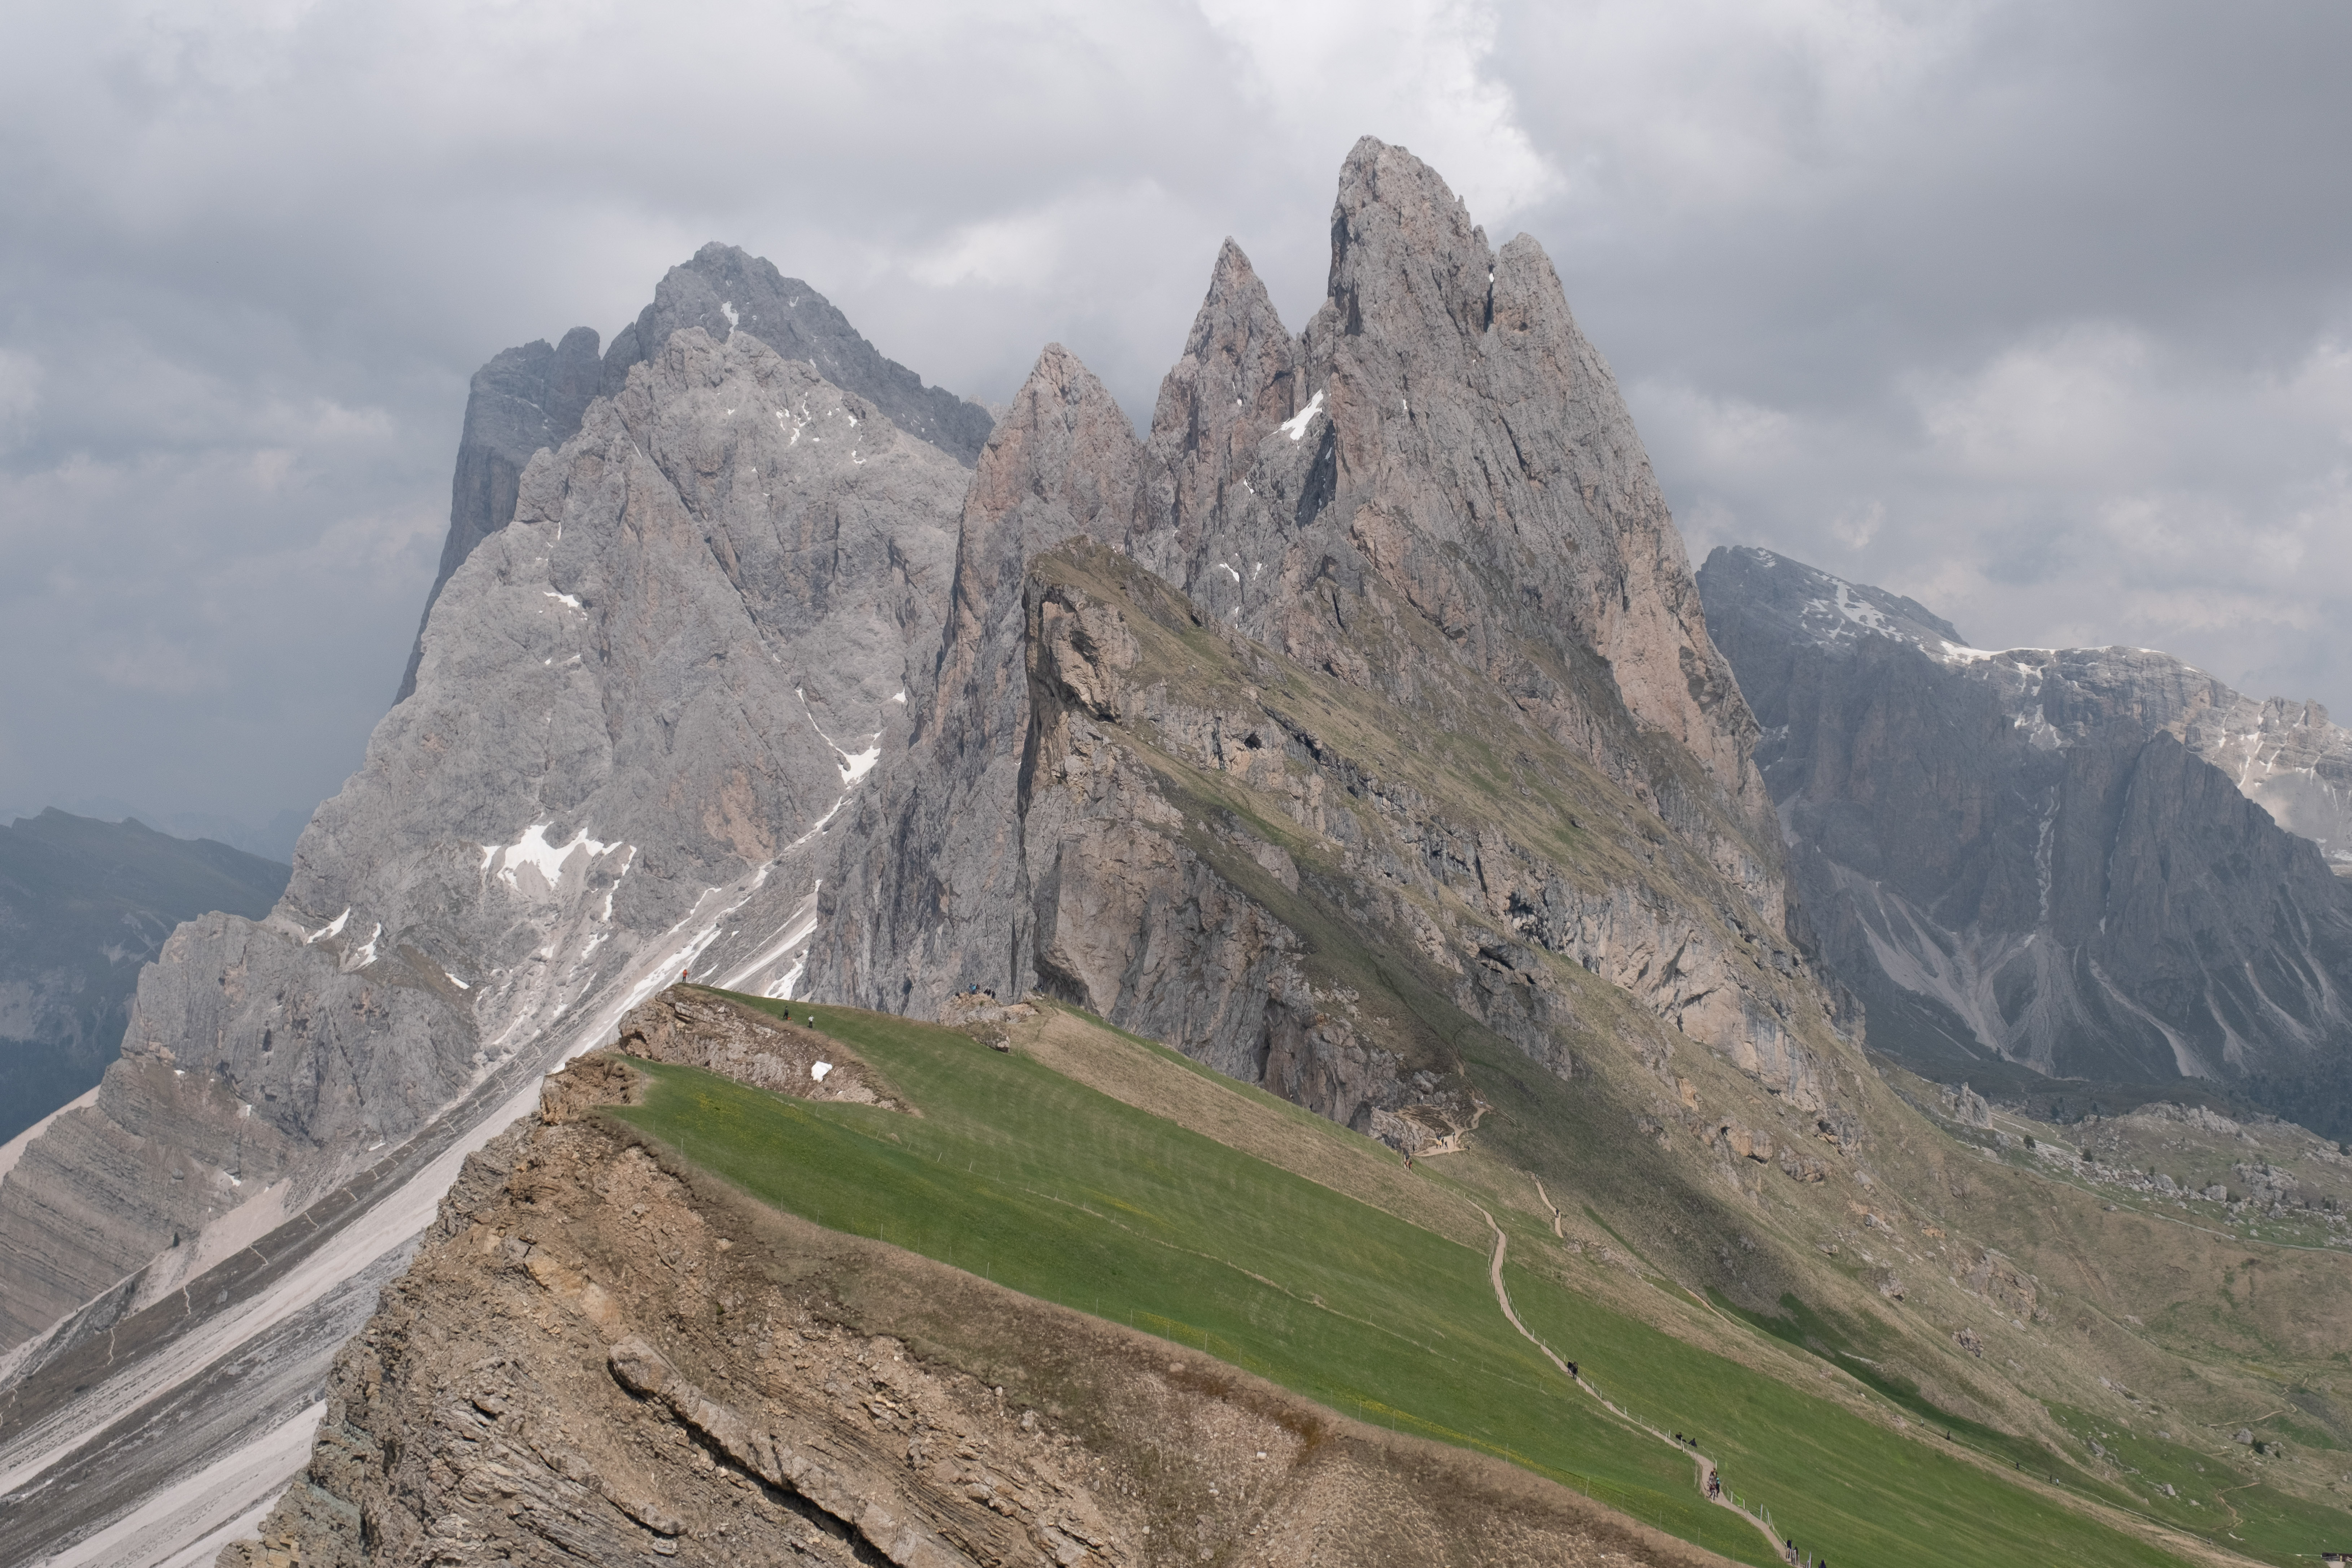
After Lago di Braies, continue driving to Ortisei and take the Seceda cable car up to the ridgeline. From the top station, it’s an easy 30-minute walk to the famous viewpoints. Please stay on marked trails and be mindful of the fragile alpine environment.
Where to stay
We spent two nights in Ortisei, which turned out to be an excellent base for visiting Seceda and Sassolungo.
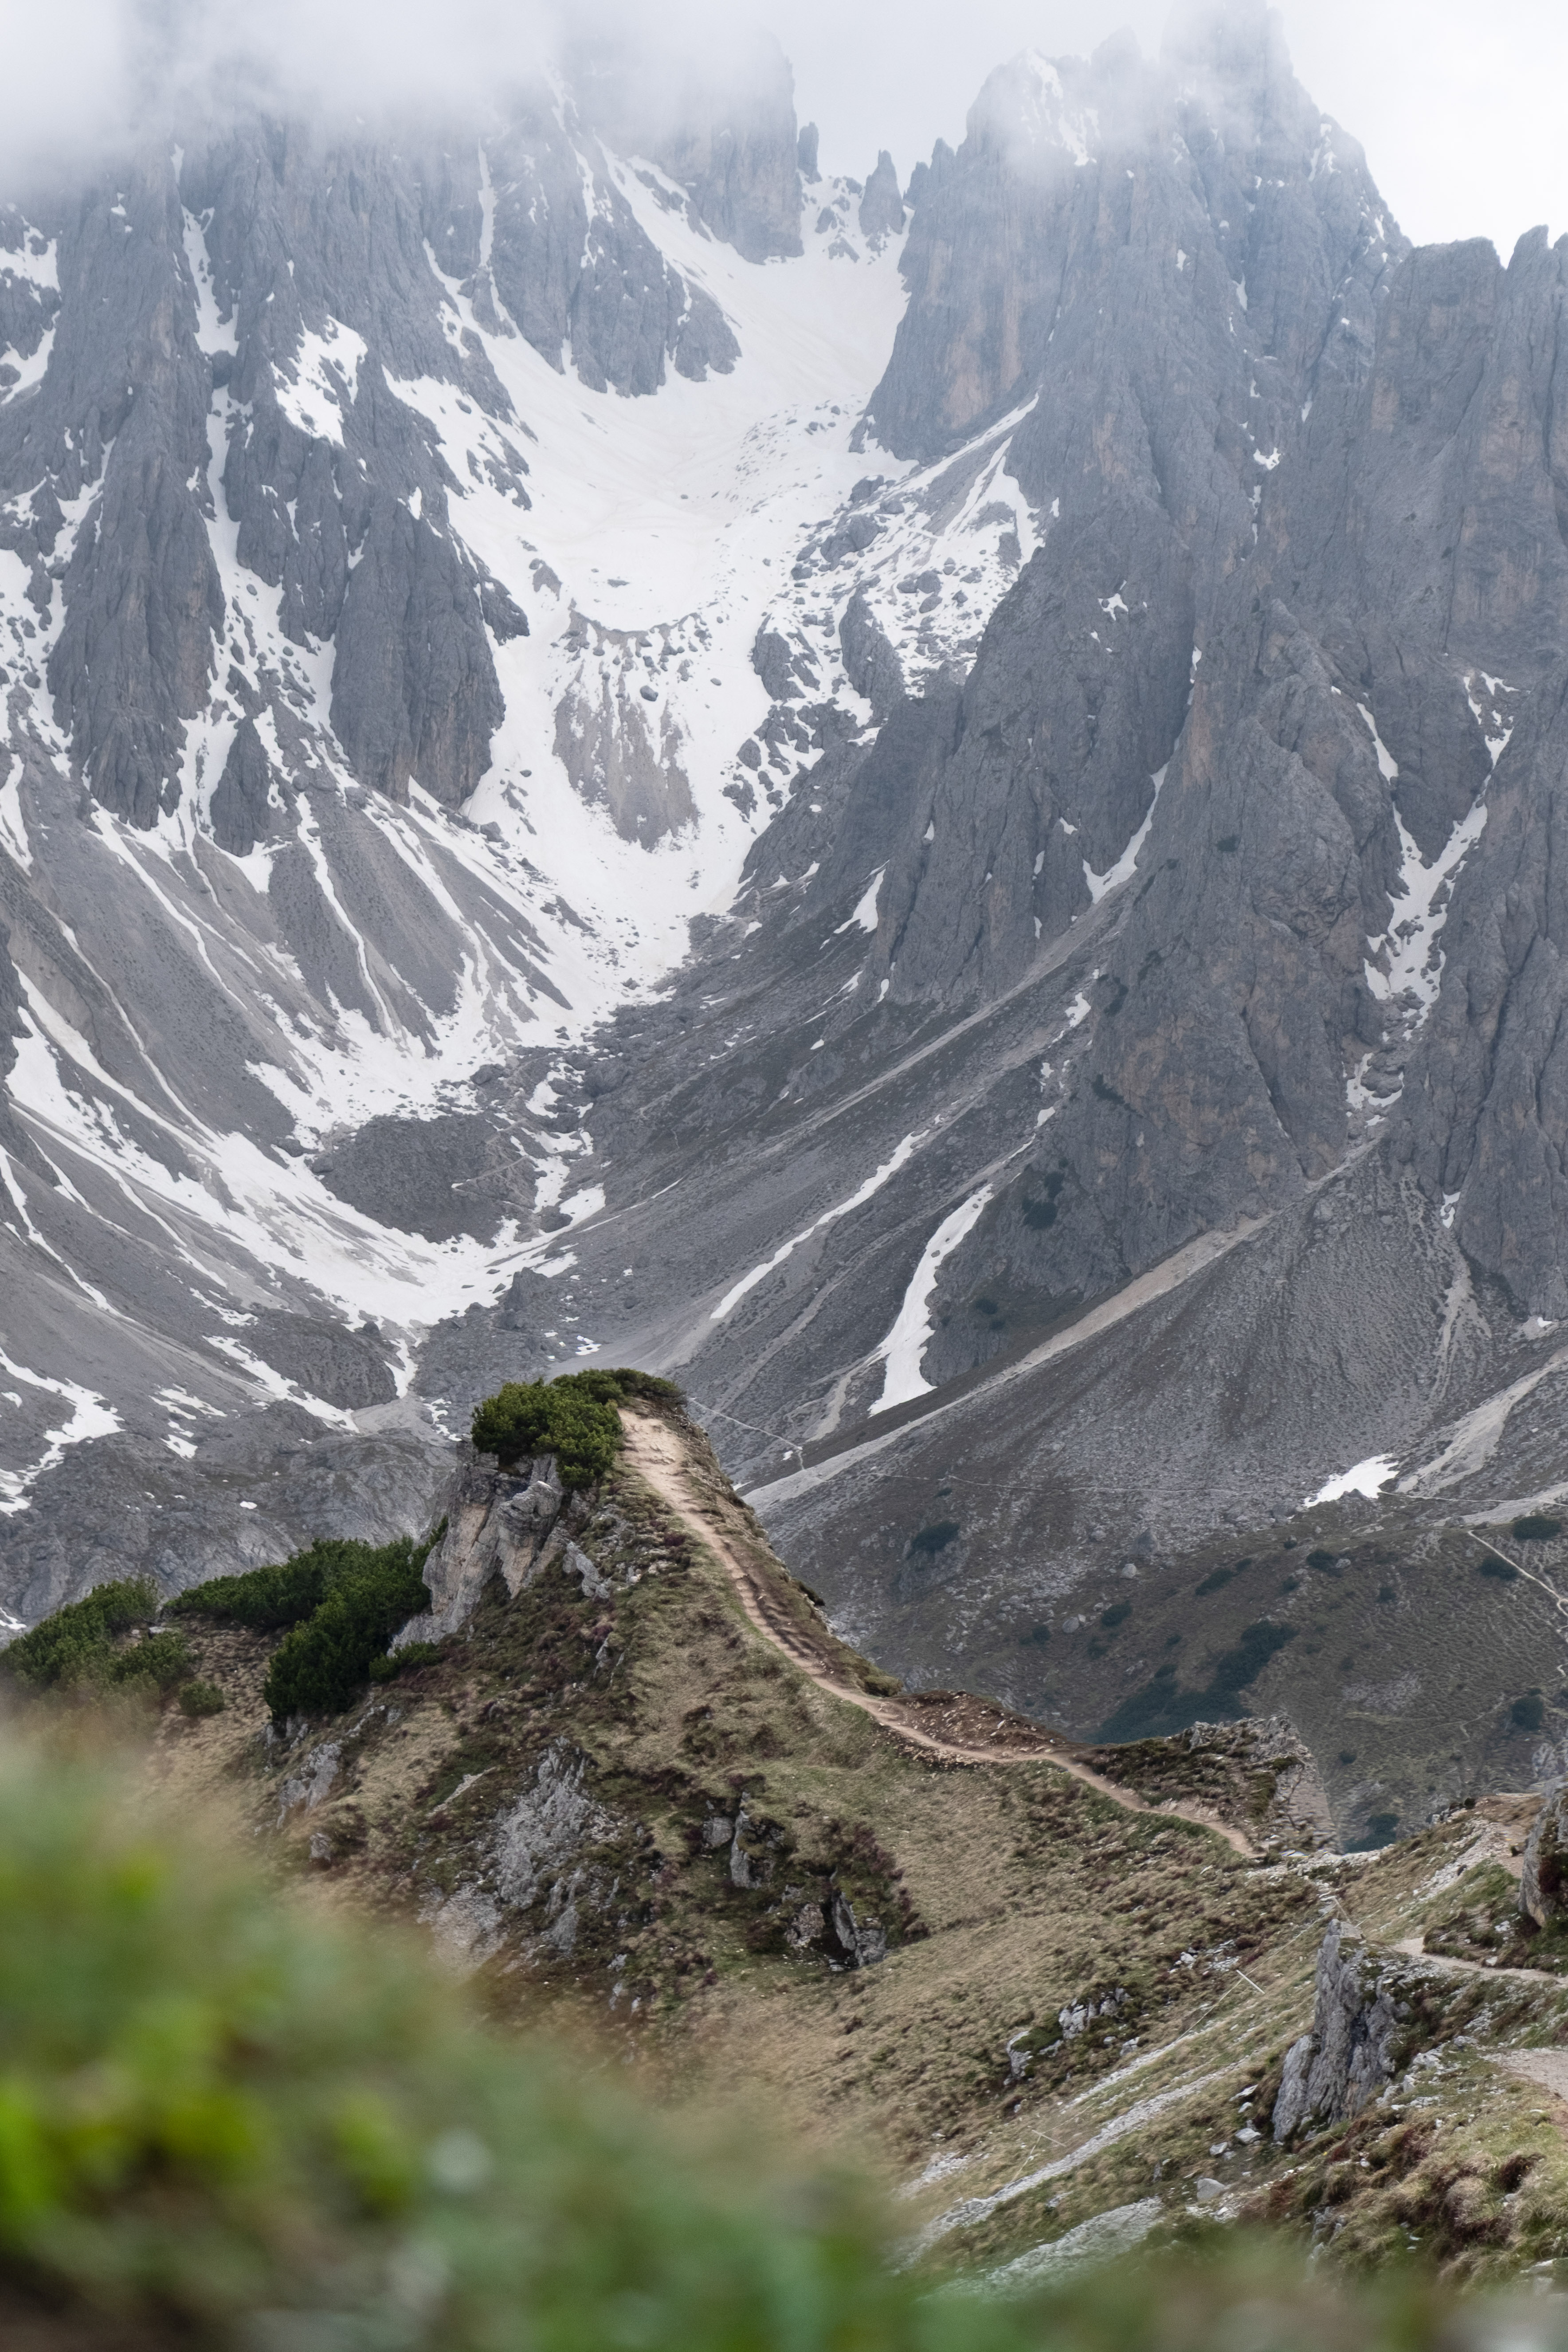
Day 5 – Sassolungo (Langkofel) Hike
We chose to hike around Sassolungo / Langkofel, starting at the Segovia Sasso Levante station. The iconic Forcella del Sassolungo cable car wasn’t operating yet in early June, so we continued on foot toward Rifugio Friedrich August (which, unfortunately, also opened a week later).
Instead, we made our way to Rifugio Sasso Piatto, where we enjoyed what might have been the best Kaiserschmarrn of our entire trip. This marked roughly one-third of the full loop.
The complete hike took us about:
- 5 hours (excluding breaks)
- 17 km distance
- 730 meters of elevation gain
It’s a rewarding hike with constant views, but plan enough time and bring sufficient water.
Day 6 – Alpe di Siusi
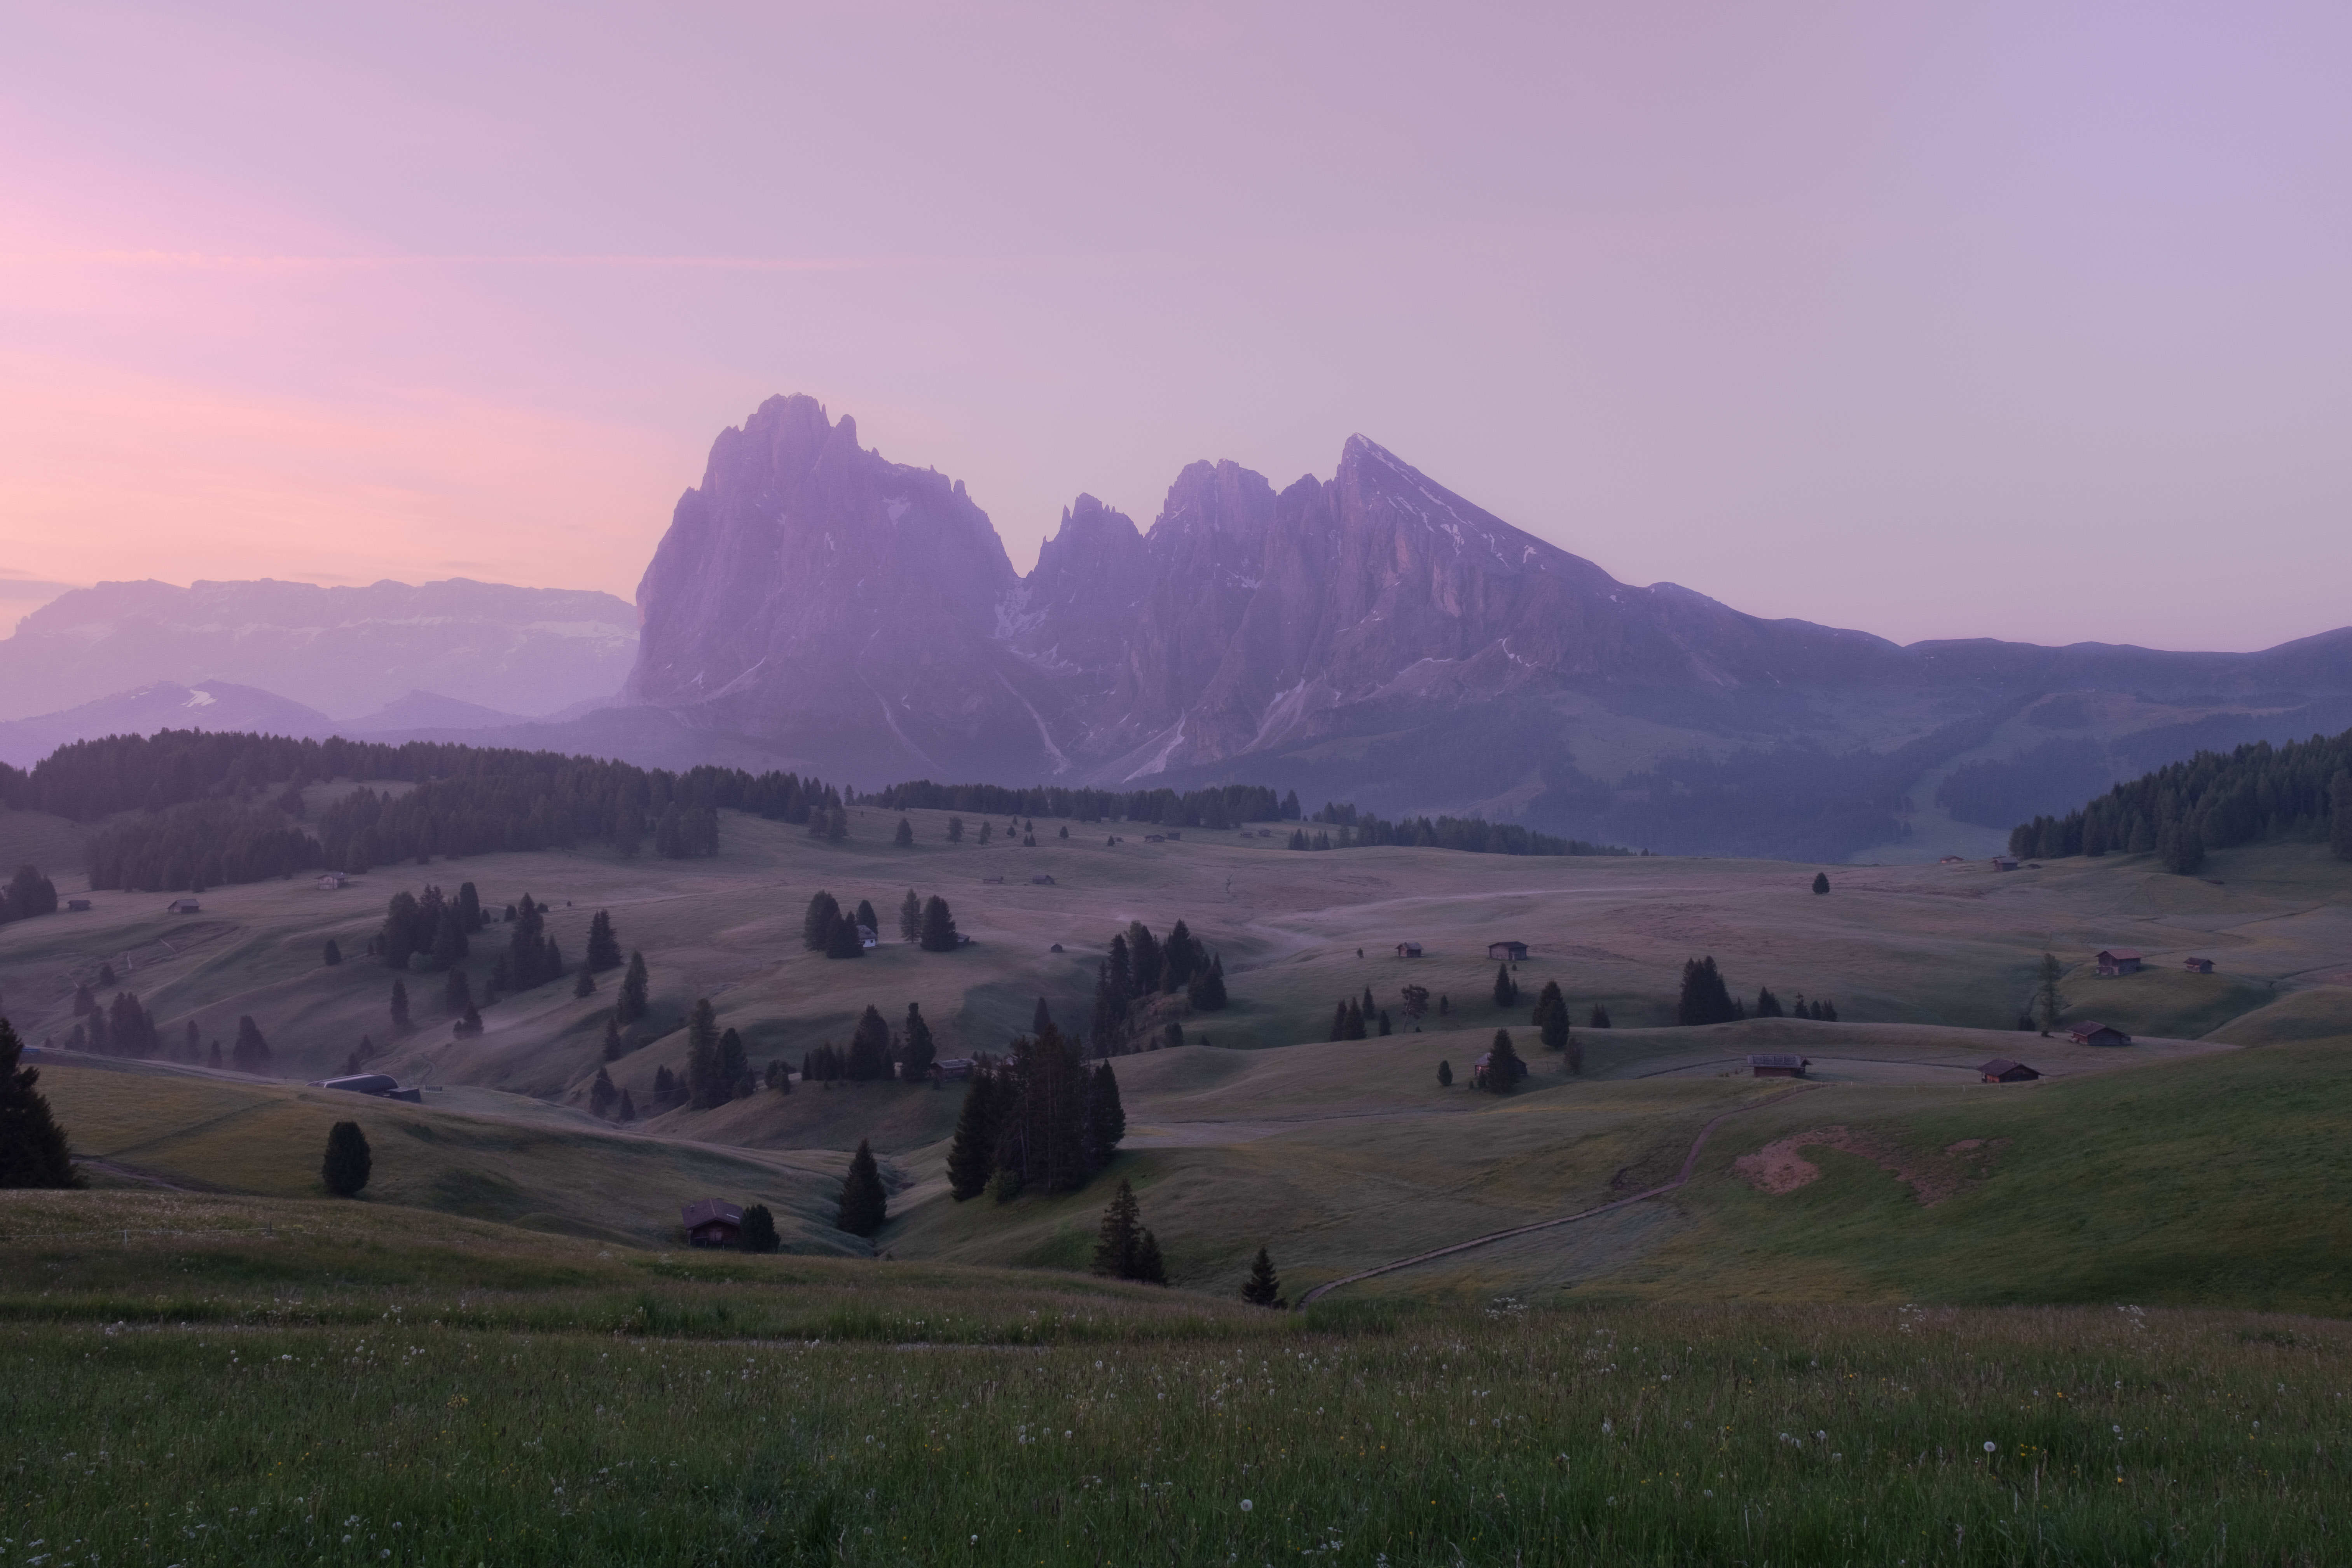
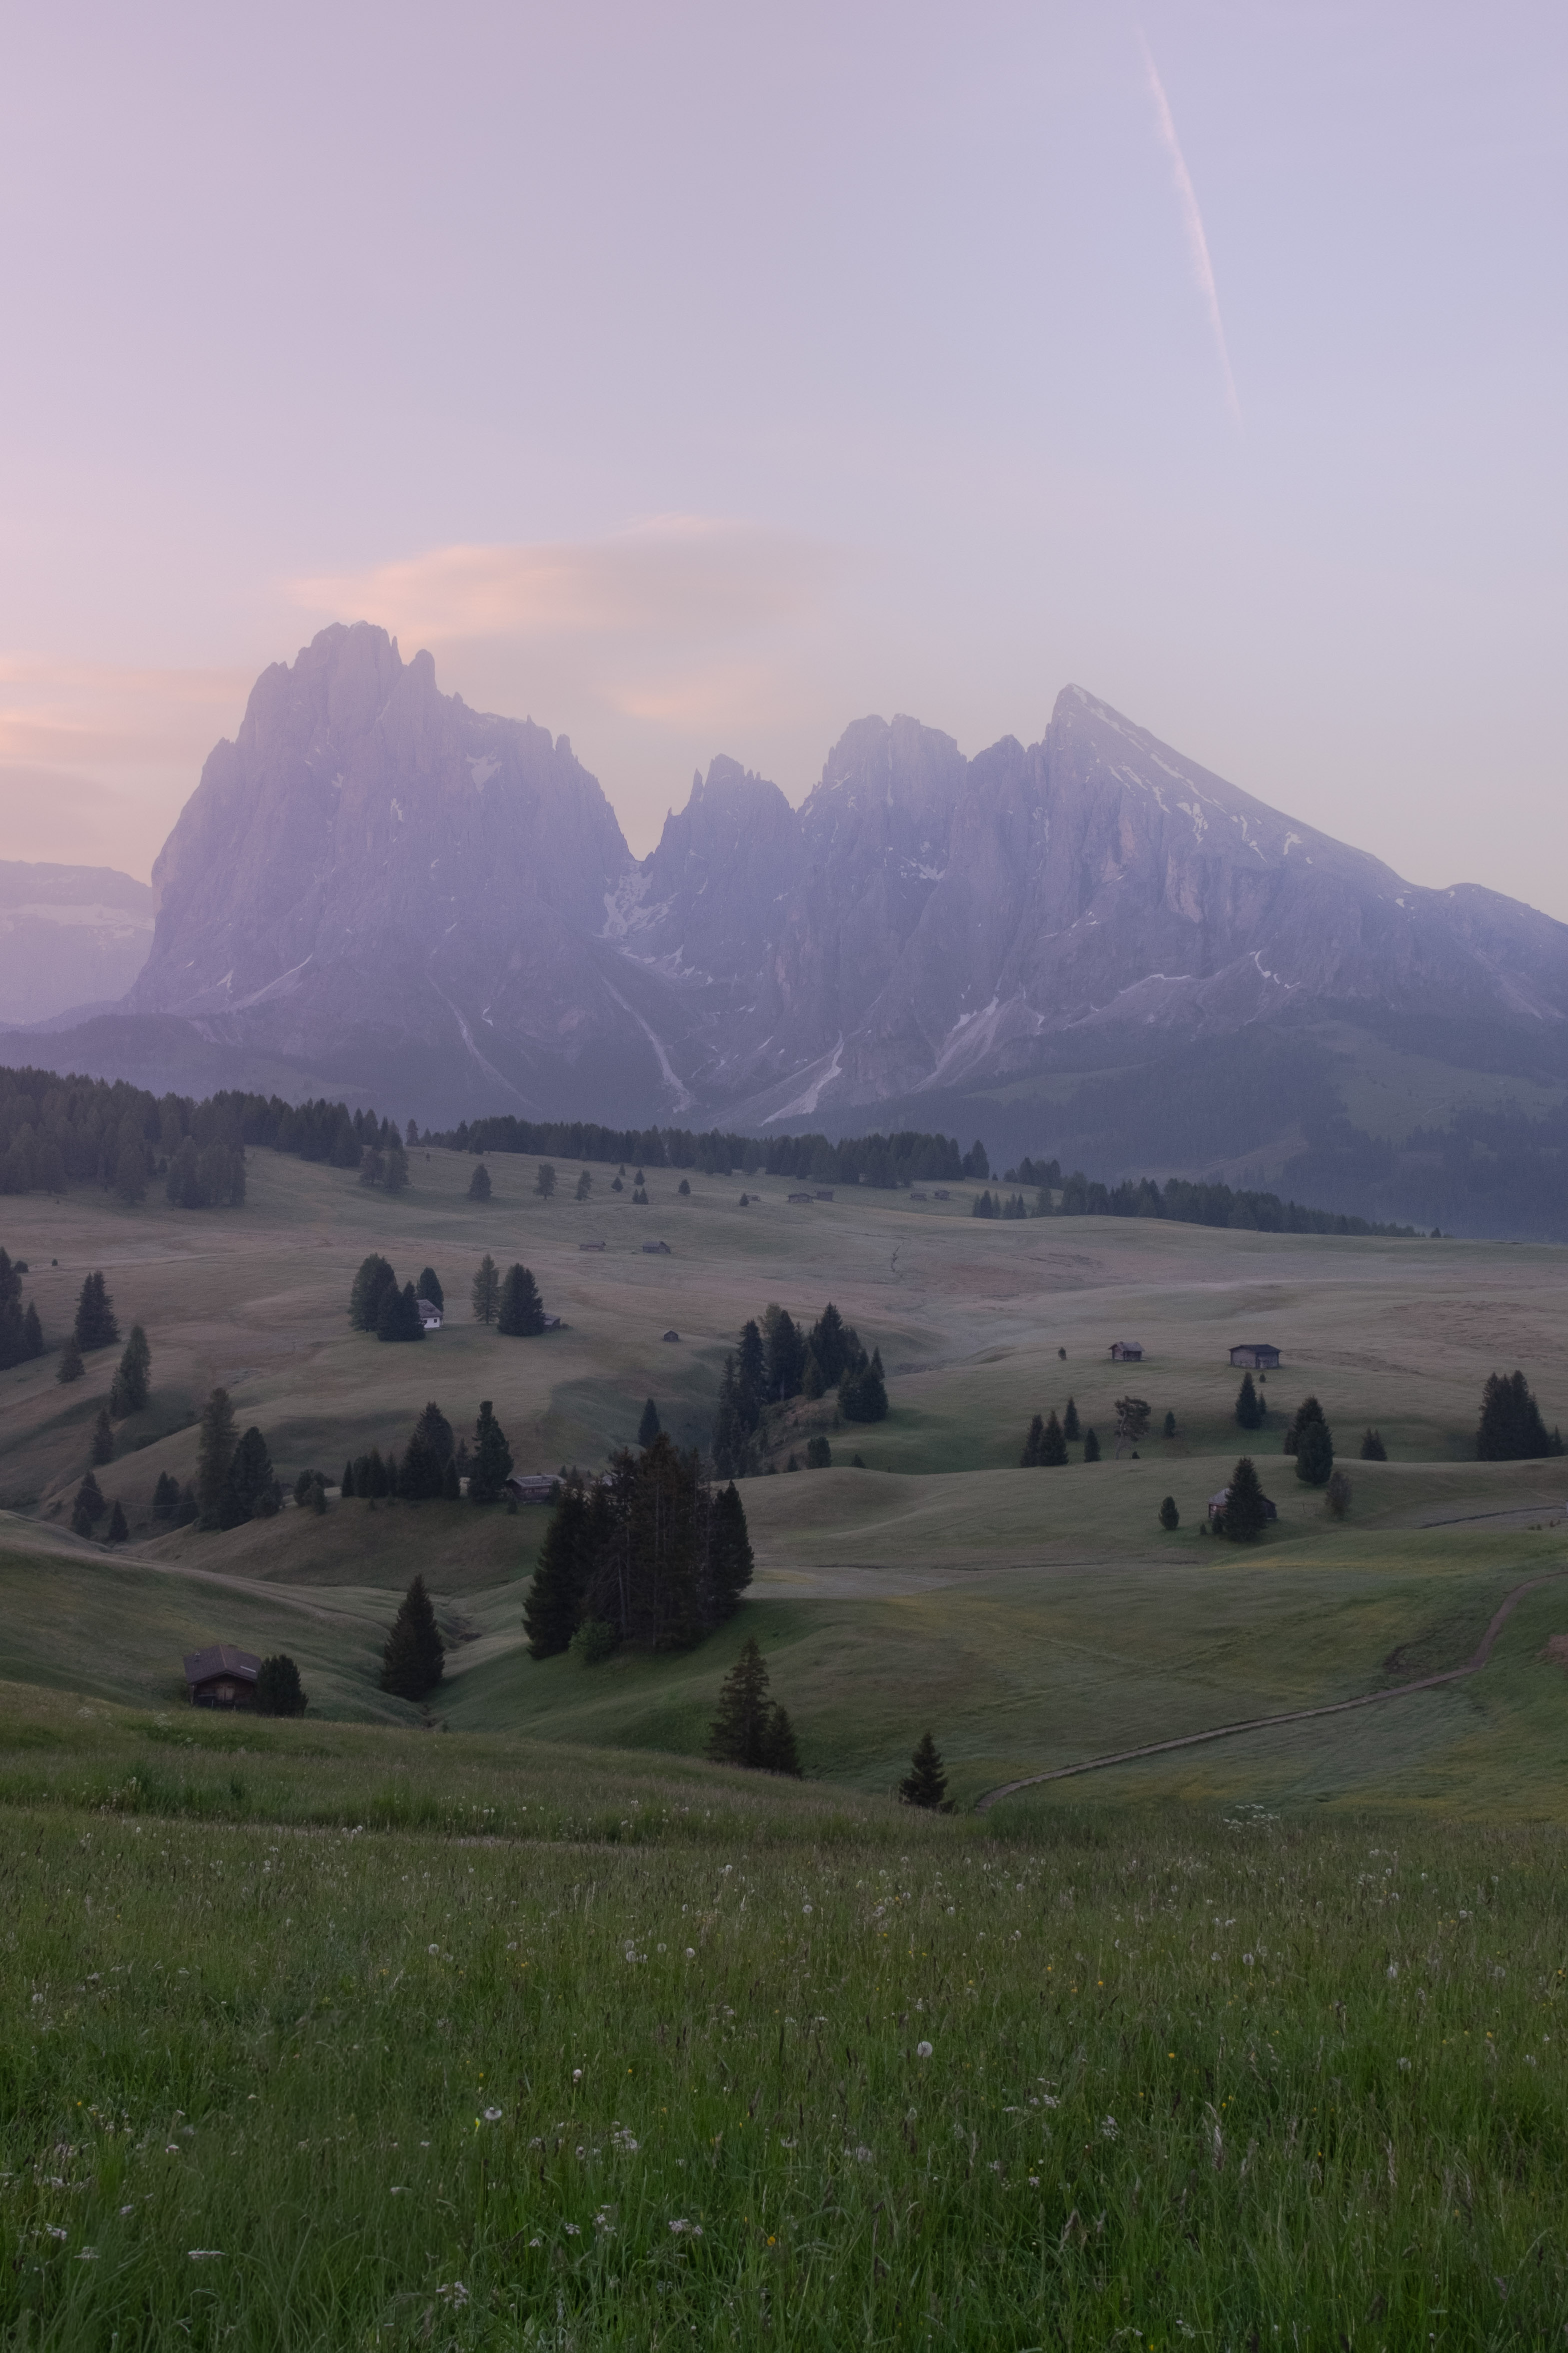
Alpe di Siusi was definitely one of the highlights of our Dolomites road trip, with wide alpine meadows, dramatic peaks, and a much calmer atmosphere compared to some of the more famous spots.
How to Get to Alpe di Siusi & Where to Stay
You have three main options:
- By gondola
Stay in Ortisei or Siusi and take the gondola up to the plateau. - By car (no overnight stay)
You may drive up to Compatsch before 9:00 am and after 5:00 pm without restrictions. You can only park at the Compatsch parking area — driving beyond that point results in heavy fines. - By car with an overnight stay
If you’re staying at a hotel on the plateau, you may drive directly to your accommodation. At the checkpoint, you’ll need to show your hotel booking and provide your license plate. No further pre-booking is required.
We chose to stay overnight on Alpe di Siusi to catch sunrise, hiking to a viewpoint near Adler Lodge Alpe — about one hour from the Compatsch parking area. It was one of the most magical moments of the entire trip. If you prefer a more relaxed start, renting an e-bike is also a great option.
Best Photo Spots in the Dolomites & Practical Tips
My Favorite Photo Spots in the Dolomites
My personal highlights were Tre Cime di Lavaredo, Seceda, and sunrise at Alpe di Siusi. Each of these locations offers a completely different atmosphere — from dramatic peaks and ridgelines to wide alpine meadows with soft morning light.
As the Dolomites continue to grow in popularity, flexibility becomes increasingly important, especially when photography is a priority. Weather conditions can change quickly, and cloud cover or fog can dramatically affect the scenery. Being able to adjust plans based on the forecast often makes the difference between a good photo and an exceptional one.
Instead of staying in one or two central hubs, we chose accommodations close to each major spot. This approach gave us the freedom to revisit locations, react to changing weather, and arrive early or late in the day to avoid crowds.
How to Find the Best Photo Spots
Finding strong viewpoints in the Dolomites isn’t always obvious from the main trails. To plan our shoots, I used the Locationscout app (not sponsored), which helped identify specific viewpoints along with tips on access, timing, and composition.
That said, some of the best photos still came from simply exploring and staying observant while hiking. Light changes quickly in the mountains, and even well-known spots can look completely different depending on time of day and weather conditions.
Final Photography Tips for the Dolomites
- Start early or stay late to avoid crowds and catch the best light
- Always check mountain weather forecasts and remain flexible
- Stay on marked trails and respect fragile alpine environments
- Allow buffer time for clouds, fog, or sudden changes in conditions
Final Thoughts
This 6-day Dolomites itinerary is designed for travelers who want to experience the region’s most iconic landscapes without rushing from place to place. By combining scenic drives, manageable hikes, and carefully chosen bases, it offers enough flexibility to adapt to weather conditions while still covering the highlights.
Whether you’re visiting the Dolomites for the first time or returning with a focus on photography, this road trip provides a well-balanced introduction to one of Italy’s most spectacular mountain regions. With a bit of planning and an open schedule, the Dolomites reward you with unforgettable views, ever-changing light, and experiences that easily justify coming back again.
